
When you think Autodesk University, you probably think about learning the latest trends and technologies but also tips & tricks on your favorite products. And that’s just what you’ll find!
For this post, I’m going to summarize some of the Advance Steel tips and tricks that I described in my class “Advance Steel Tips, Tricks, and Workflows You’ll Want to Try at the Office” during the Autodesk University MEP & Structural Fabricators Forum 2017.
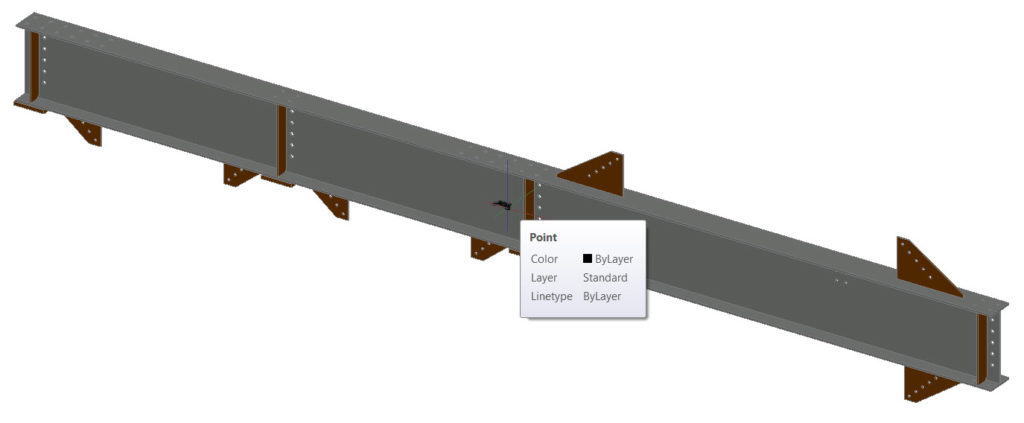
1. Center of Gravity
The Center of Gravity point of an object or an entire assembly can be found in the model by using the “Center of gravity and total weight calculation” command. As a result, an AutoCAD point is displayed in the model showing the center of gravity of that element.
2. Assign a Material to a Layer
When defining what an entire object will look like, it is a good idea to create a new material (using a specific color or texture) and assign it to this object. If you want to apply this material to several similar objects on the same layer, the Material Attach command can be used to assign a material to a layer with a simple drag & drop operation.
3. Using specific colors for parts on drawings
You can use specific rules to assign some of the standard AutoCAD colors to Advance Steel objects displayed on drawings. Once these colors are entered in a specific table accessible through the Management Tools, they become available in the Drawing Styles Manager. You can then use them when customizing a drawing style so that your drawings look like you want them to.
4. Convert multiple DWG shop drawings to PDF file
The Document Manager gives you the possibility to convert your DWG drawings to PDF files. But did you know that you can choose between converting into a single PDF file or multiple PDF files?
5. BIM Coordination with a Coordination model
With the collaboration model feature, you can use the Navisworks link to reference models from other members of the design team within Advance Steel to help you develop a better design. In this video, you will see how you can export steel members from a Revit model to Advance Steel, and how you can XREF the rest of the project as a Coordination model through Navisworks.
6. Panorama rendering for Google Cardboard VR
You can generate a Stereo Panorama from your Advance Steel 3D model that can be viewed in a Google Cardboard or compatible device. This offers a great and inexpensive opportunity to check your design in an early stage of the process.
If you want to watch the full class, check out the recording here.
For other Advance Steel tips and tricks, read these posts on BIM and Beam:
- Top 10 Features in Advance Steel 2018
- Tracking modifications in a structural steel 3D model has never been easier!
If you want to see some other Advance Steel features in action, watch the Advance Steel Product Features playlist on YouTube.
The post Advance Steel Tips, Tricks, and Workflows You’ll Want to Try at the Office appeared first on BIM and Beam.
from my Autodesk source Bim & Beam: BIM and Beam at http://blogs.autodesk.com/bim-and-beam/2018/02/14/advance-steel-tips-and-tricks-and-workflows-youll-want-to-try-at-the-office/
via IFTTT
Thanks for sharing the information keep it up Structural Analysis in USA
ReplyDelete