Thursday 26 October 2017

SOFiSTiK | 2018 – presentation day in London

The “SOFiSTiK | 2018 – presentation days” are aimed at entrepreneurs, interested structural engineers, and experienced SOFiSTiK users who want to learn more about the latest developments in construction planning.

SOFiSTiK’s development goals for the version 2018 were to optimize usability and performance in combination with a totally redesigned workflow for BIM analysis and design.

In their presentation day, they will present the new features and workflows of SOFiSTiK | 2018 using application examples focusing on FEA and BIM.

Read more…

The post SOFiSTiK | 2018 – presentation day in London appeared first on BIM and Beam.


from my Autodesk source Bim & Beam: BIM and Beam at http://blogs.autodesk.com/bim-and-beam/2017/10/26/sofistik-2018-presentation-day-london/
via IFTTT

Wednesday 18 October 2017

Top 10 Features in Advance Steel 2018

Advance Steel 2018 Badge 790px

The new release of Advance Steel 2018 has been out for a few months now. Here is a highlight of the top 10 features in case you haven’t had the chance to get familiar with them yet.

Advance Steel 2018 Badge 790px


1 – One Advance Steel installation

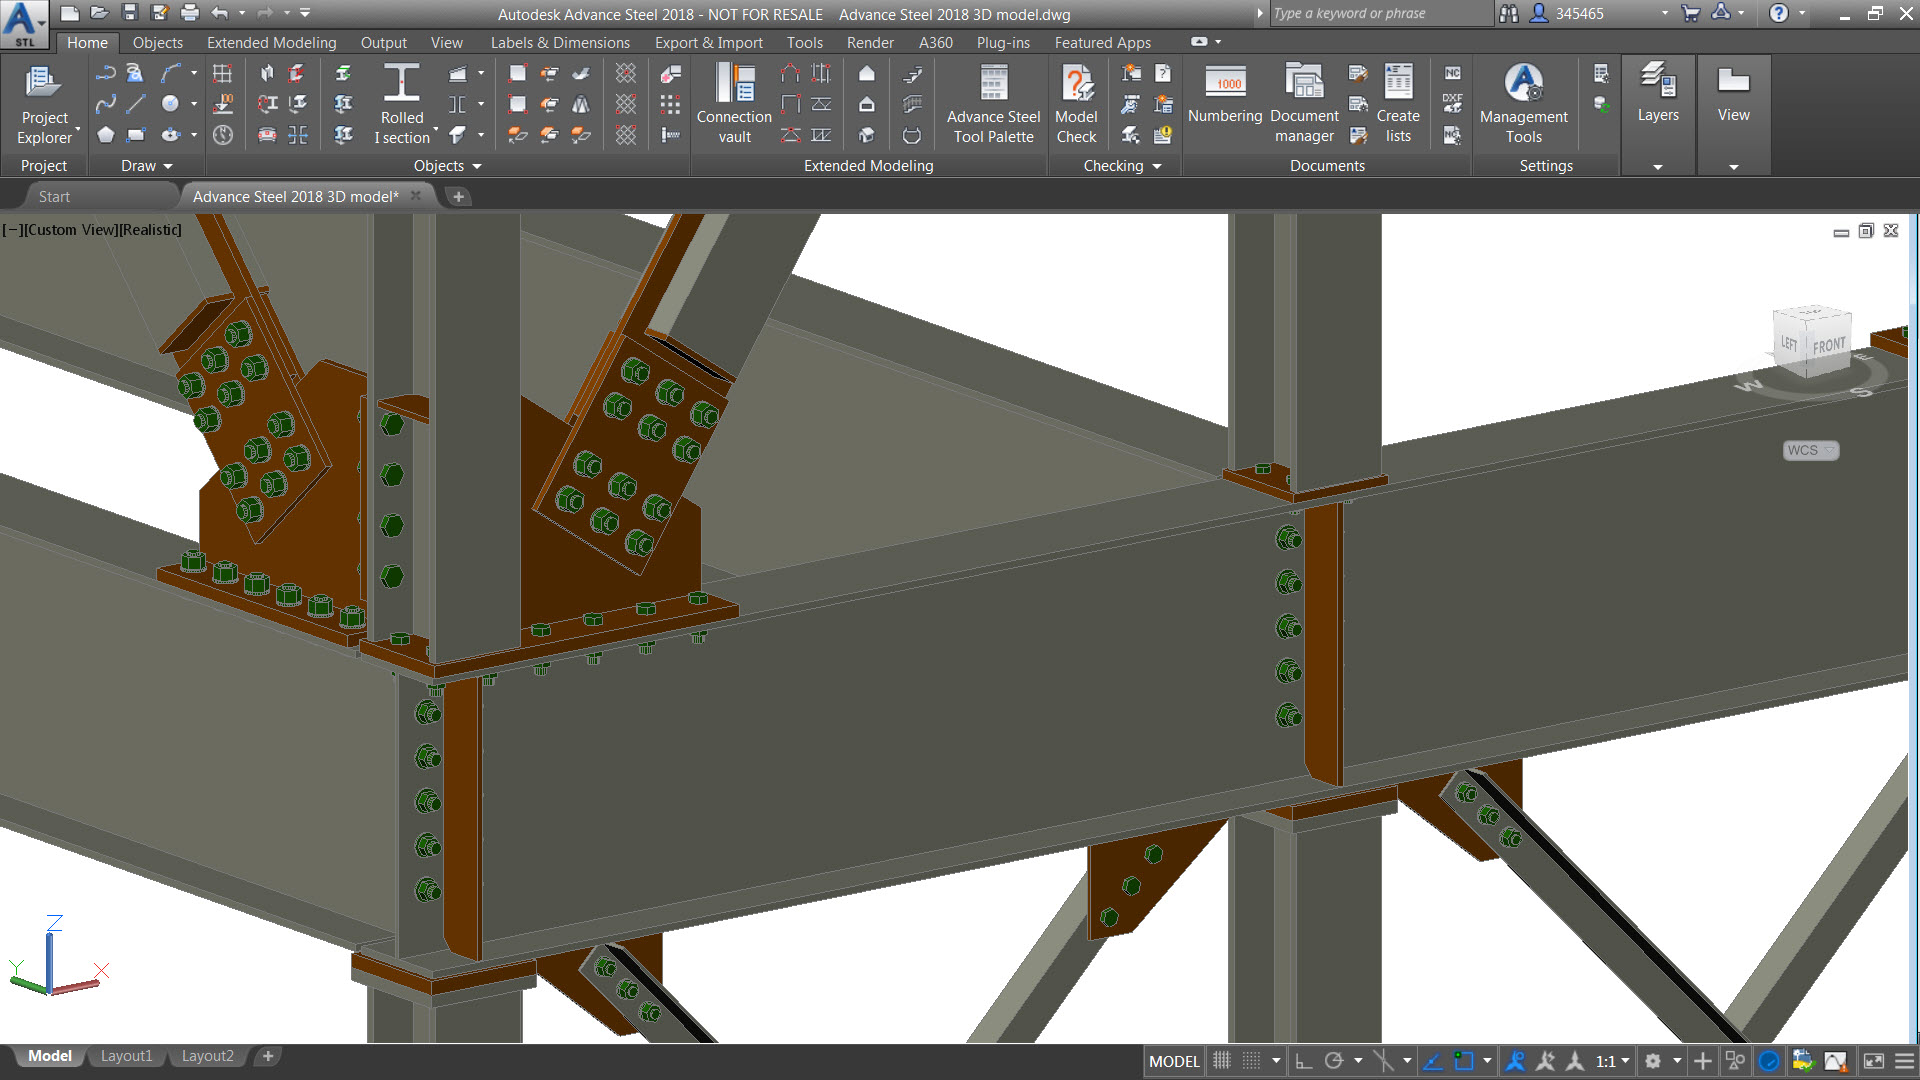
By combining the functionality of the two products into a single executable, there is no need any more for customers to separately install both AutoCAD 2018 and Advance Steel 2018 software on their desktop.

Advance Steel 2018 Installation

When you install Advance Steel 2018 you will see an icon for Advance Steel on the desktop. Selecting the Advance Steel icon will give the user access to the Advance Steel and embedded AutoCAD functionality.

Tip: users who would like to run just the AutoCAD functionality of the product can select ‘Autodesk Advance Steel 2018 – AutoCAD’ from the Start Menu.

2 – Migrate custom settings tool

The Migrate Custom Settings tool offers a modern and informative interface for migrating your custom settings and files from a previous release to Advance Steel 2018.

Advance Steel 2018 - Migrate Custom Settings

It helps detect and identify customized settings and enables you to choose which ones you would like to migrate. A summary report created from the migration offers comprehensive information in an easy-to-read format.

Tip: If you change your mind about migrating settings from a previous release, you can easily restore Advance Steel default settings using the Reset tool, which is available from the Start menu.

3 – Combine model views with cameras

Model views combined with cameras help simplify the process of creating general arrangement drawings.

Advance Steel 2018 - Combine model views with cameras

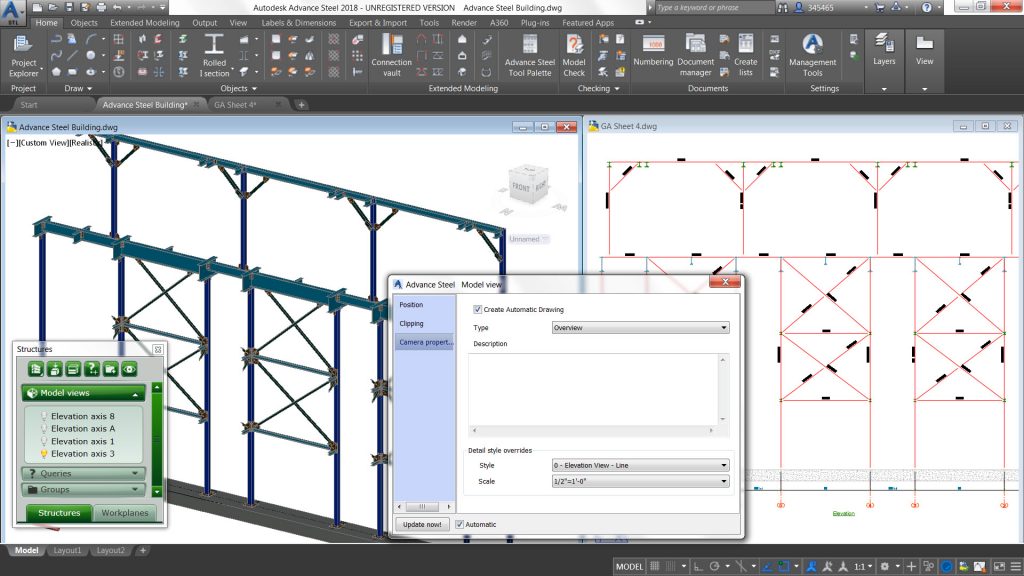
Advance Steel 2018 now enables you to combine a model view with a camera and use it for drawing creation by assigning it a specific drawing style & scale. By using a Drawing Process, you can automate the creation of general arrangement drawings based on these cameras. As a result, you get drawings automatically labelled and dimensioned based on your preferences.

4 – Call out on drawing

With the new “Create callout view” feature, you can now create a call out view from a 2D view or 3D view directly within the drawing.

Advance Steel 2018 - Call out

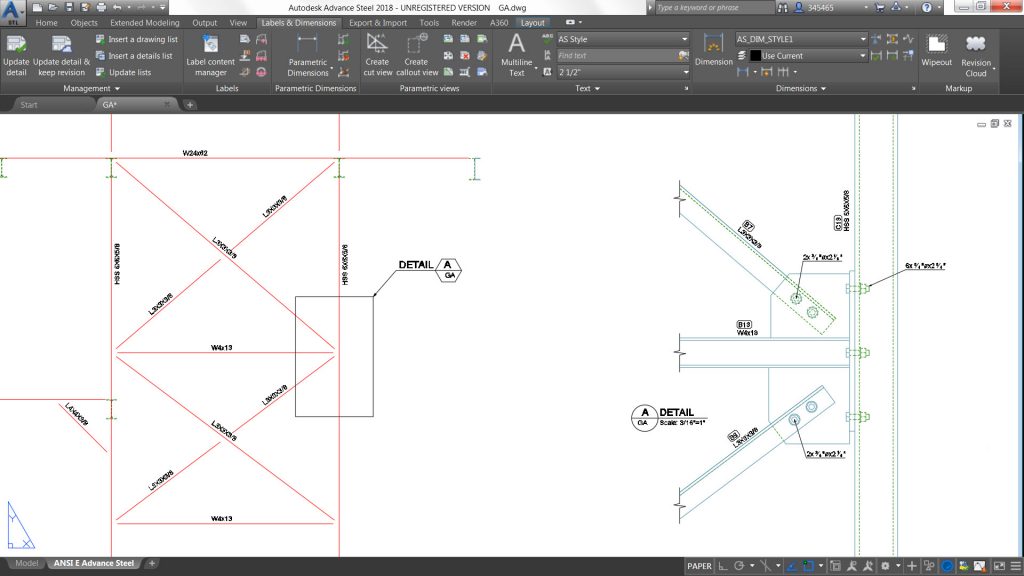
Once you have created the call out, you can move the title placement with its grip and you can control the frame appearance and change it – for example from a rectangle to a circle or vice-versa.

This new feature helps you create more compelling drawings more quickly and easily.

Tip: when creating the call out, by pressing S like Settings, you can access a dialog where you can specify the scale and assign a specific presentation to be used.

5 – Drawing styles for manual cut views on drawings

Advance Steel 2018 offers the possibility to better control ready-to-use presentations available when adding a manual cut or a call out view on a drawing.

Drawing styles for manual cut views

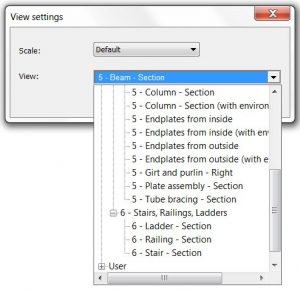
The drawing styles manager enables you to select which view presentations you would like to have available with a new option “Used for Cuts and Callouts” located under “View properties” tab.

When inserting a manual cut or a call out view within a drawing, press S like Settings to access the “View settings” dialog containing the predefined view templates and select the one you want to use for the view you add to the drawing.

6 – Enhanced local content for the US market

The weld symbol has been enhanced (text & symbol size) to match better local requirements.

Advance Steel 2018 - Enhanced local content for the US market

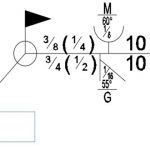
The US release is also delivered with dedicated drawing styles for shop drawings of U and C shape beams. It also has some presentation enhancement such as the hatch pattern representation for holes on shop drawings.

7 – Multi-ball stanchions handrail

Advance Steel 2018 provides a new automatic & parametric macro for inserting prefabricated ball stanchions.

Advance Steel 2018 - Prefabricated handrail

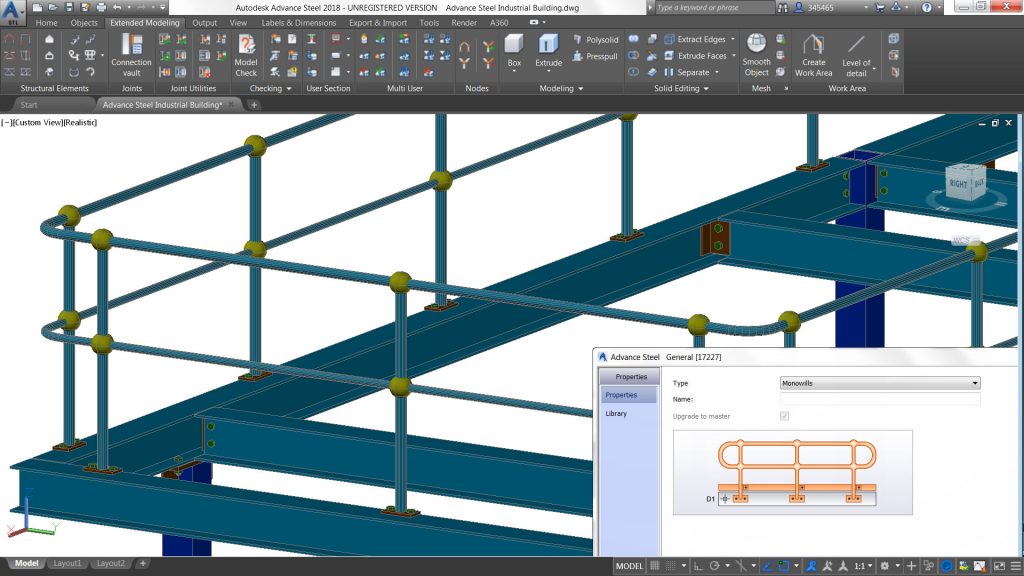
These ball stanchions are from Australian & New Zealand providers and are inserted as special parts in the 3D model.

8 – Cold rolled purlin connections

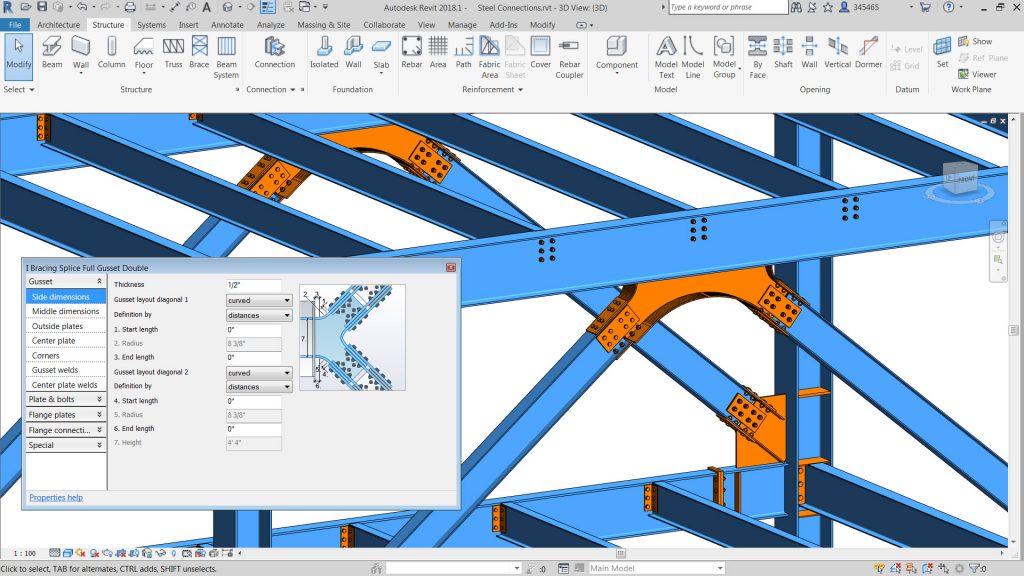
Advance Steel 2018 provides a new automatic & parametric connection for cold rolled sections (such as purlins and side rails).

Advance Steel 2018 - Cold rolled purlin connection

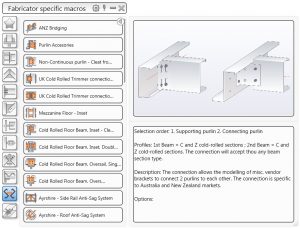
The connection can be started from the Connection vault and offers various options in regards to the brackets (from Australia & New Zealand) available by default.

Tip: It is easy to adjust the settings from the properties dialog box, you can add more vendors within the database controlling the macro.

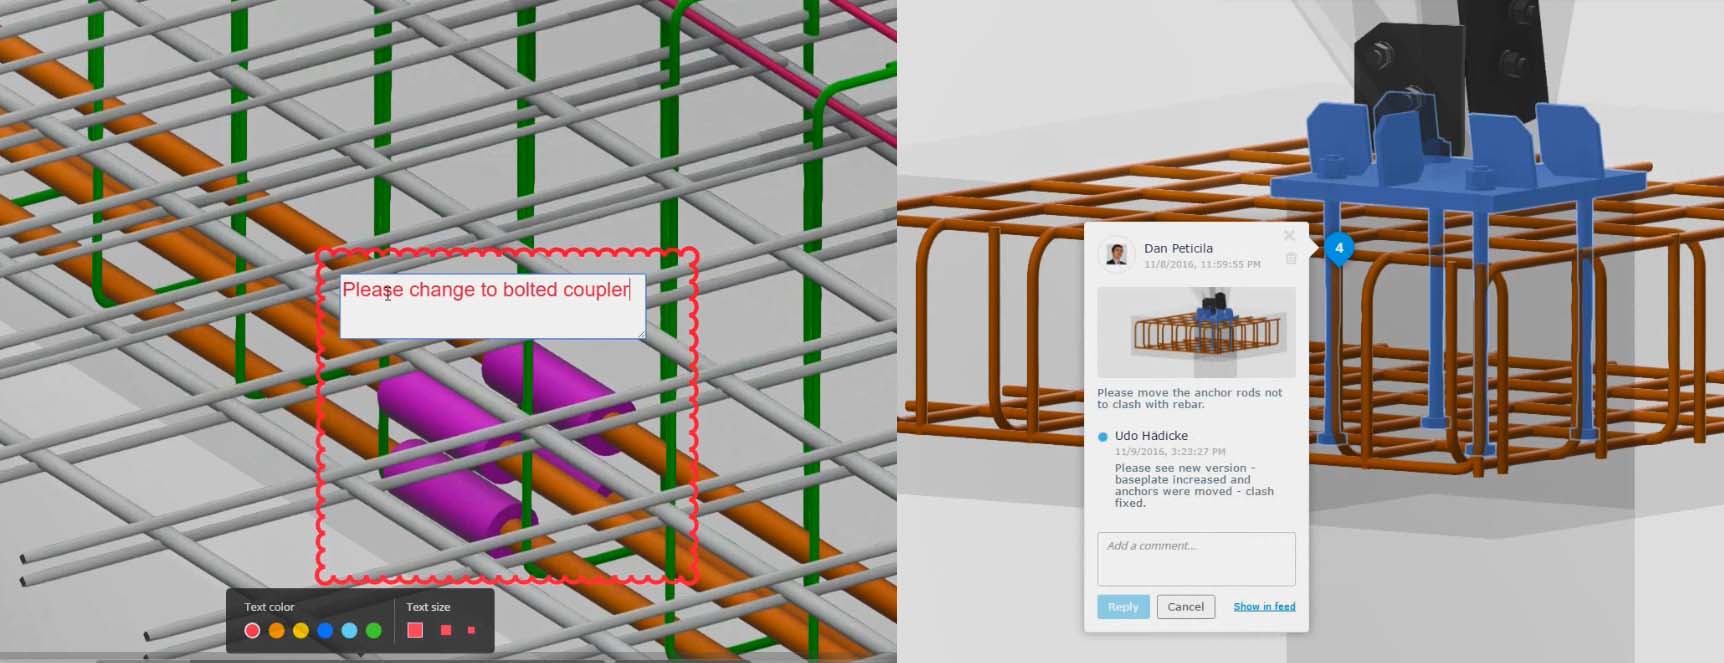
9 – Custom objects stored in the DWG file of the 3D model

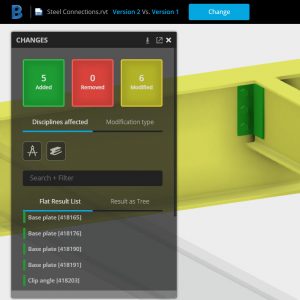
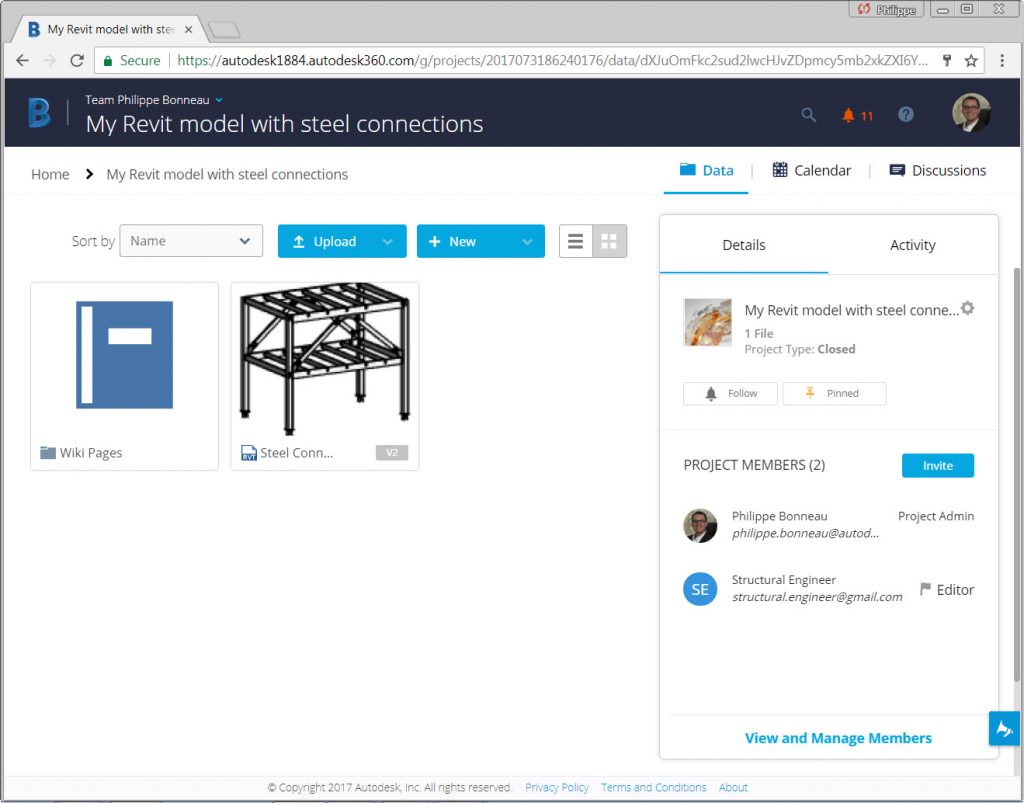
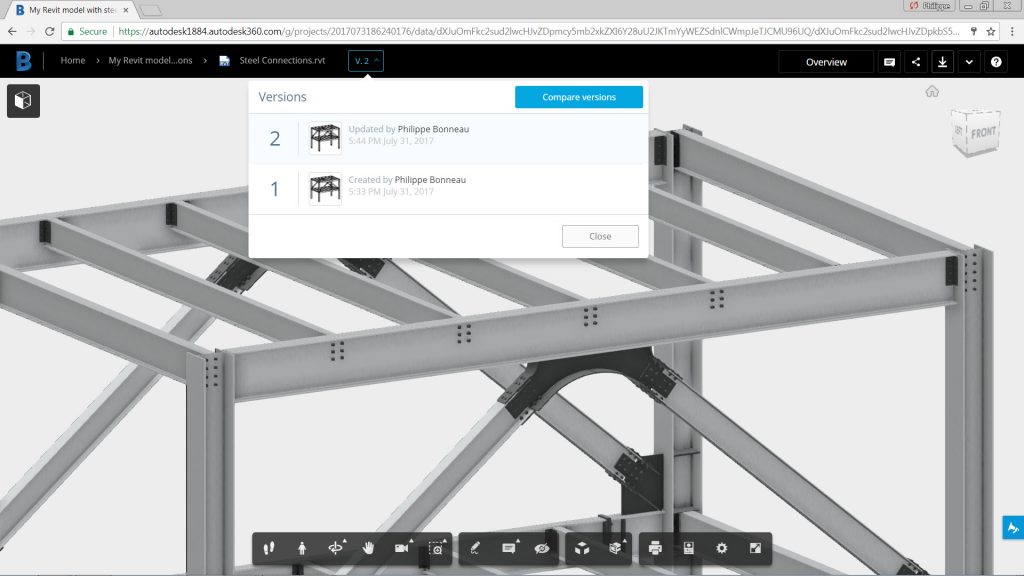
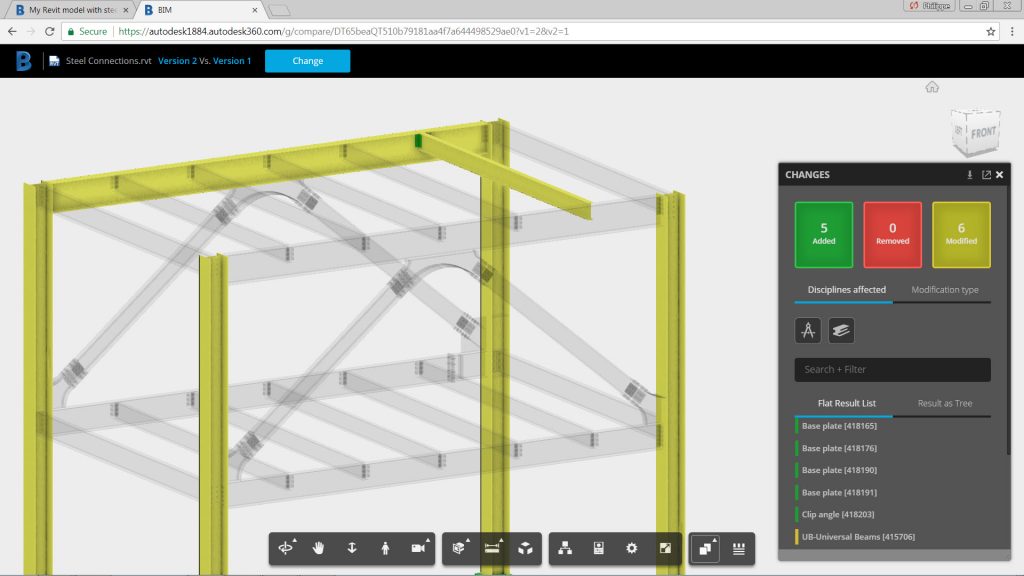
If your Advance Steel model contains custom properties such as custom sections or materials, you can choose to write this information in the DWG file so that other project team members or stakeholders can visualize the entire model in other products such as Navisworks, AutoCAD Plant 3D, BIM 360, or A360 Viewer.

Advance Steel 2018 - Store data in the DWG file

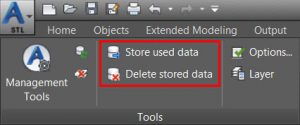
Tip: if you change your mind about including custom properties in your Advance Steel DWG file, you can use the “Delete stored data” icon available in the User Interface.

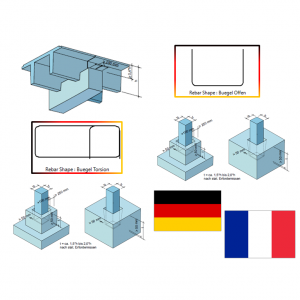
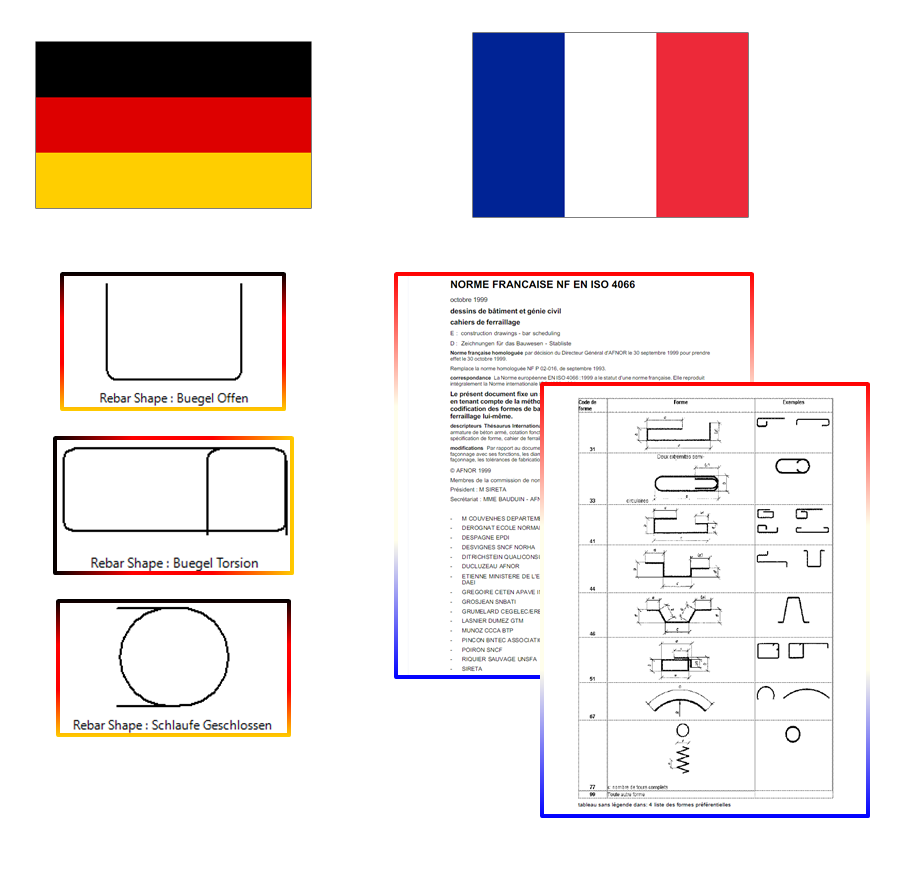
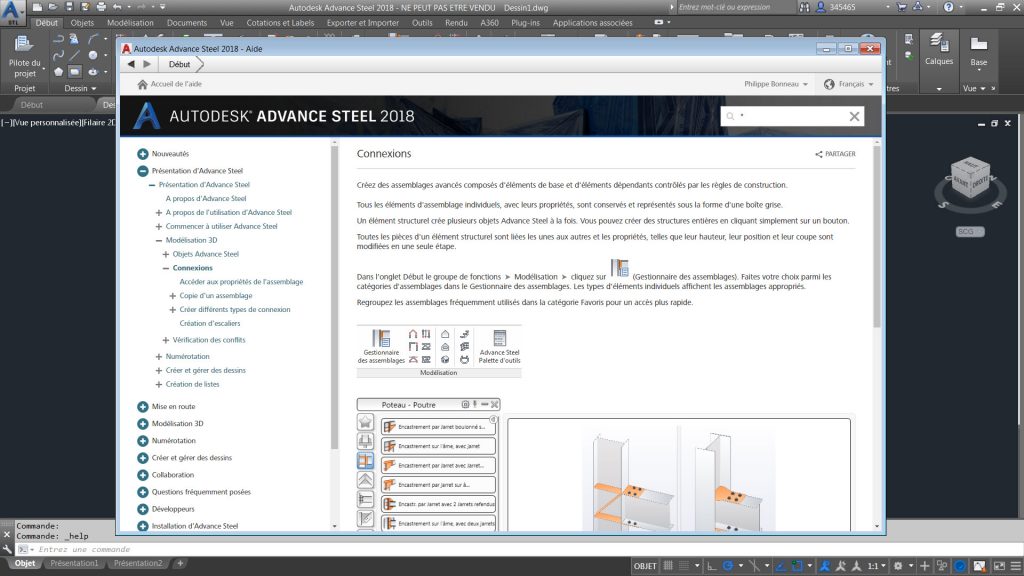
10 – Localized online help documentation

The online help documentation, which has been available only in English until now, is also available in French and German languages.

Advance Steel 2018 - Localized online help documentation

If you want to see some of these features in action, watch the Advance Steel 2018 New Features playlist on YouTube.

The post Top 10 Features in Advance Steel 2018 appeared first on BIM and Beam.


from my Autodesk source Bim & Beam: BIM and Beam at http://blogs.autodesk.com/bim-and-beam/2017/10/18/top-10-features-advance-steel-2018/
via IFTTT

Friday 13 October 2017

BIM for Reinforced Concrete – Rebar clash prevention

Rebar

This article is the continuation of a conversation that I started with the blog post depicting the value of BIM for Concrete and continued with from 2D to 3D with rebar detailing. If you’ll remember, I’ve described what I see as four main benefits for a BIM-centric approach to concrete:

  1. Combines the versatility of 2D documentation with the higher level of fidelity and accuracy of 3D modeling of steel reinforcement and concrete accessories, with minimal effort to produce both.
  2. Allows users to design and detail with rebar clash prevention in mind to reduce clashes both in the preconstruction and site execution project phases.
  3. Enables the transition from design to detailed models while respecting both perspectives, following local code requirements, and automating the process of making changes so they are less disruptive to the design process.
  4. Increases transparency and quality of the model information being used from bidding to procurement by not only providing quantifiable information, but also enabling access to it in collaboration friendly environments.

In this post, I want to focus on benefit #2, and discuss how leveraging rebar clash-detection for concrete can benefit both the preconstruction and execution phases of a project.

Benefit #2: The BIM-centric concrete solution allows users to design and detail with rebar clash prevention in mind to reduce clashes both in the preconstruction and site execution project phases.

There are many practical reasons why having rebar clashing on a construction site is highly undesired, causes serious project delays and therefore significantly increases project cost.  This can easily happen in seismic regions when large diameter rebar are used and it is not possible to resolve clashing issues by just adjusting bar shapes on site or when rebar distribution needs to be very dense as typically required for power station structures. More examples can be uncovered.

When a clash is detected, an intervention (change order) is typically sent to detailers as the finding still comes late in the design to construction process.

Clash detection tools like Navisworks can help in such situations, detecting clashes in cases where a rebar model is delivered in 3D earlier than when rebar are being fabricated and installed.

Definitely, best is when a detailed definition of rebar layouts comes already correct from rebar detailers. There are several enablers helping rebar detailers be successful and deliver clean and precise instructions for rebar fabricators and installers. Let’s name these opportunities:

Precise positioning and coordination with other objects

Precise rebar placement mechanisms mentioned above and software intelligence can guide detailers to define rebar positions with respect to all geometrical boundary conditions; both 2D and 3D snapping, increment based guiding, non-overlapping positioning with regards to rebar radiuses and diameters works as a desired clash prevention.

Precise rebar placement

Setting rebar for clash-avoiding behavior

More importantly, Revit rebar objects are born with certain intelligence respecting logic that detailers can define for it. For example, this means that we can set up rebar to behave in order to keep right distance from concrete faces, right distance from other rebar, being still adjacent to each other when rebar diameter changes, or adjust redistribution in function of changing sizes of concrete hosts, etc.

The implanted behavior makes rebar respecting detailers intent and therefore avoiding clashes as they are created and when model changes come into play.

 Constant distances in rebar for Revit

(Imposing constant distances for rebar in Revit)

What we see is what we get

As simple as it sounds, seeing rebar cages in three dimensions and with realistic sizes greatly increases a detailer’s perception and understanding of proposed reinforced concrete configurations.

Unlike with traditional shop drawings where each perspective needs to be presented in a separate view, as rebar cages are defined in Revit we can see the whole rebar cage in a single 3D view, manipulate with it, see it from all angles, and in context of adjacent model elements. All while authoring.

Dynamic 3D view in Revit

(Dynamic 3D view in Revit)

Early review and 3D model inspection

Having a broader 360 perspective with more than a single pair of eyes is usually the recommended method to secure quality for any task, rebar detailing included.

It’s amazing how easy it has become lately to share model information for a review with others.

Simply sharing the Revit model through BIM 360 makes it available via a simple link for stakeholders for inspection / review / commenting / comparison of changes. Exposing a proposed solution to others before it’s locked and stamped as rebar detailing submittals greatly increases the quality of the detailed fabrication and installation recommendations and therefore, again, makes it clash free oriented the moment it leaves a detailer’s room.

 BIM 360 Viewer Screenshots

(Screenshots from a web browser containing BIM 360 viewer)

All in all, the clash-free rebar reality is the result of a few factors: technology enablers, a detailer’s attitude, and yes … if a contractual clause specifies it as a requirement.


The post BIM for Reinforced Concrete – Rebar clash prevention appeared first on BIM and Beam.


from my Autodesk source Bim & Beam: BIM and Beam at http://blogs.autodesk.com/bim-and-beam/2017/10/13/rebar-clash-prevention/
via IFTTT

Wednesday 11 October 2017

New Structural Content in Revit 2018.2

New Precast Content

New Precast families for beams, columns, slabs, and foundations are now available.

Revit users can choose between various types of I-shape, T-shape, trapezoidal and many other beam cross sections. Columns having different corbels configurations and top supporting conditions for beams have been created. TT slabs and isolated foundations, both block and sleeve, are also part of the new Precast content.

The extended range of parameters that control their geometry allow for faster and more precise modelling of Precast concrete structures.

The German version of the families is based on Fachvereinigung Deutscher Betonfertigteilbau specifications.

The content is localized in English and German and can be downloaded from the Autodesk Knowledge Network.

This new content allows users faster and more precise modelling of Precast concrete structures.

Rebar Content Update for France and Germany

New French and German rebar shapes have been added to the Library, to enhance rebar modelling.

Among the French rebar shapes, we have also included the ones according to the older French code NF P 02 016:1993, which many French customers use throughout their projects.

The German library has been too updated with three shapes, again, to offer a complete range of rebar shapes used in this region.

The new content can be downloaded from the Autodesk Knowledge Network.

This provides enhanced rebar modelling to support better local standards.

Learn more on what’s new in Revit 2018.2.

The post New Structural Content in Revit 2018.2 appeared first on BIM and Beam.


from my Autodesk source Bim & Beam: BIM and Beam at http://blogs.autodesk.com/bim-and-beam/2017/10/11/new-structural-content-in-revit-2018-2/
via IFTTT

Tuesday 10 October 2017

Advance Steel in Autodesk AEC Collection

Advance Steel Thumbnail

Advance Steel User Interface

Structural engineers, detailers and fabricators struggle with siloed teams, disconnected workflows, and varying software platforms that do not integrate seamlessly. This requires manual processes to bridge gaps which can lead to expensive errors and fabrication waste.

To help address these challenges, we have added Advance Steel software to the AEC Collection.

AEC Collection Badge 1024p

The AEC Collection now provides structural professionals with integrated tools for a seamless, BIM-based process that connects steel design, fabrication, and construction in a more efficient and accurate way. With steel detailing more tightly linked to design, fabrication progresses more smoothly and fabricators collaborate more easily with designers and construction partners to enhance overall project quality.

Watch the following video to see how Revit and Advance Steel can work together to provide a more seamless BIM workflow from design to fabrication:

Key business benefits of the AEC Collection (now with Advance Steel):

  • Drive greater efficiency in the design process:
    • Explore different design alternatives that connect to structural analysis and BIM
    • Integrate structural analysis and design with BIM to improve the quality of the structural design
    • Provide more coordinated and accurate fabrication deliverables for estimating and production
  • Connect engineers, detailers and fabricators through better communication:
    • Coordinate across multiple disciplines to ensure a better design
    • Communicate changes between engineers and detailers more easily to reduce the impact on fabrication
    • Share the most up to date project information with the office, shop and field.
  • Reduce waste in shop and field production
    • Integrate model based deliverables with MIS software and CNC driven fabrication machines
    • Extend fabrication workflows to better plan, coordinate and execute on site
    • Optimize the detailed design to reduce fabrication and installation costs
    • Accurate BOM procures only needed quantity


We have thousands of customers worldwide using Advance Steel today. Here are a few examples of their projects:

  • New Bulgari factory in Valenza, Italy: watch out for this video
  • Louvre museum in Abu Dhabi, UAE: learn more with this customer success story
  • New operational support building at Regina Airport, Canada: discover the project by reading this article
  • The Lucas residential development in Boston, USA: check out this recent blog post
  • Imperial Beach branch of the San Diego County Library, USA, learn more on BIM & Beam

The post Advance Steel in Autodesk AEC Collection appeared first on BIM and Beam.


from my Autodesk source Bim & Beam: BIM and Beam at http://blogs.autodesk.com/bim-and-beam/2017/10/10/advance-steel-autodesk-aec-collection/
via IFTTT

Wednesday 4 October 2017

Tracking modifications in a structural steel 3D model has never been easier!

Thumbnail for compare tool - size 780 by 780

Understanding what has changed between two versions of a design is a challenge for structural engineers.

BIM 360 Team provides a tool which helps project managers, designers, and engineers better understand design changes across the different versions of a 3D model. Using this tool, users can compare two versions of a Revit file and get the differences being highlighted with color-coding.

In this example, we will be using a steel structure project modeled in Revit. The 3D model contains steel connections which have been inserted by using the Steel Connections for Revit 2018 extension, which gives access to 130 parametric steel connections, enabling connections to be modeled with a higher level of detail.

Revit model with steel connections

BIM 360 Team allows you to upload project files to enable project members to collaborate on the project. You can invite team members, just enter the email addresses of the people you want to invite and click Send Invitations. The role of project team members determines their project access level.

View and manage team members in BIM 360 Team

With BIM 360 Team, users can compare two versions of a Revit model and easily understand what was Added/Removed/Modified between the two versions.

To start using the tool, simply choose a Revit file that has multiple versions and select the “Versions” drop-down list and then click the “Compare version” button. Select the two versions to compare and wait a few seconds for both models to be loaded and their data to be compared.

Compare tool in BIM 360 Team

The Changes palette will indicate the number of any additions, removals or / and modifications. And selecting an item in the change list will highlight that object in the model view.

Change palette results

You have the possibility to turn on/off the various filters such as “Disciplines Affected” or “Modification Types” to narrow down the list of changes that you are interested in reviewing. “Disciplines Affected” include: Architecture, Structure, Electrical, Piping and Mechanical.

Disciplines affected by the changes

Information about modified object can also be displayed so that users get details on each change to understand it better.

Information dialog in BIM 360 Team

The compare tool helps understand which structural framing element and/or steel connection has been modified, added or deleted in the 3D model since its last publish.

Watch and share this YouTube video further describing the Compare Tool in BIM360 Team.


The post Tracking modifications in a structural steel 3D model has never been easier! appeared first on BIM and Beam.


from my Autodesk source Bim & Beam: BIM and Beam at http://blogs.autodesk.com/bim-and-beam/2017/10/04/tracking-modifications-in-a-structural-steel-3d-model-has-never-been-easier/
via IFTTT