

The longitudinal reinforcement bars in columns can be tied together with separate smaller diameter transverse bars along the column height or they can be spirally-reinforced.
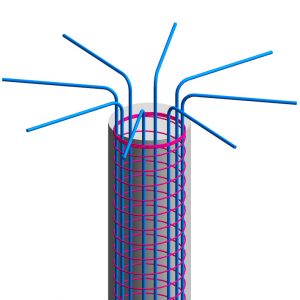
Spirally-reinforced columns they are ones in which the longitudinal bars are arranged in a circle surrounded by a closely spaced continuous spiral.
Advantages to using spirally reinforced columns
There are two main advantages to using Spirally-Reinforced columns over tied ones.
Improved safety for your structure – Several important structures collapsed due to stirrups opening when subjected to seismic actions. This risk is minimized in the case of using spiral stirrups, since it consists of only one wire as transversal reinforcement, throughout the entire length of the element.
Assembly on site – The circular section concrete columns with spiral transversal reinforcement are easier to produce, require a shorter time to assemble, and when subjected to lateral loads the failure by stirrup opening is not an option.
Creating spirally reinforced columns in Revit
Now you may wonder if it is possible to model Spirally-Reinforced columns in Revit and how to do it.
The answer is YES you can do it and the process of adding such rebars is very similar to adding regular stirrups but is a bit tricky.
In the next series of steps let me show you how to create spirally-reinforced round columns in Revit:
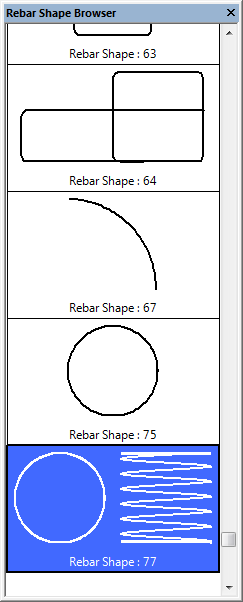
1. In the Rebar Shape Browser you can fine the spiral shape. In the UK template it is the Rebar Shape 77. You might be surprised that selecting this shape and trying to add it to your concrete column does not work because the software does not allow you to add this particular shape like you can do with others.
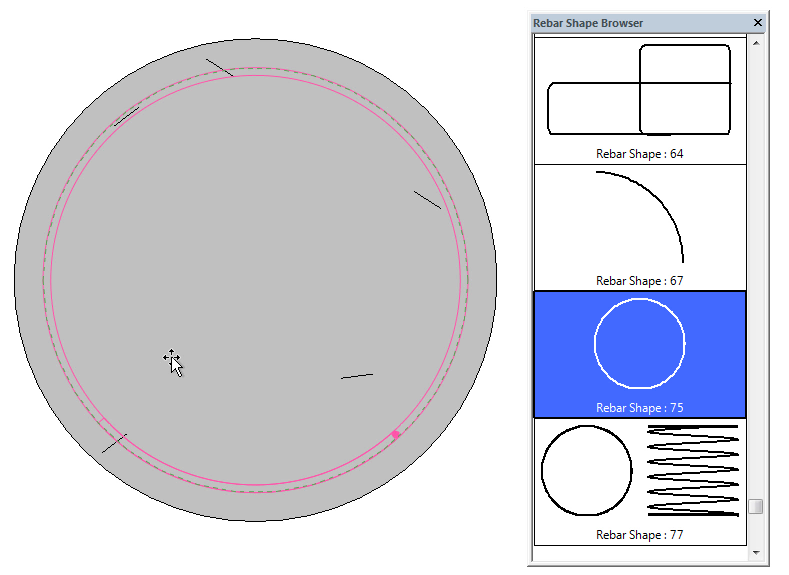
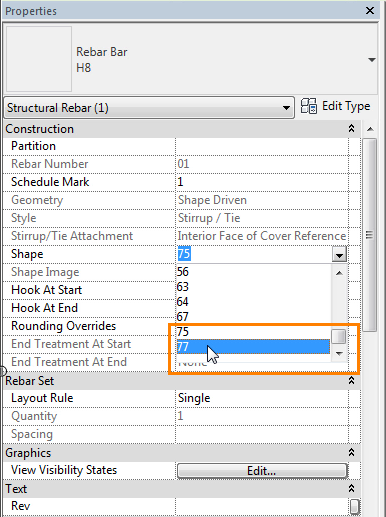
2. Instead of adding this spiral shape, first you need to create a circular shape first (e.g shape 75) then change it into the spiral one (shape 77) through rebar properties.
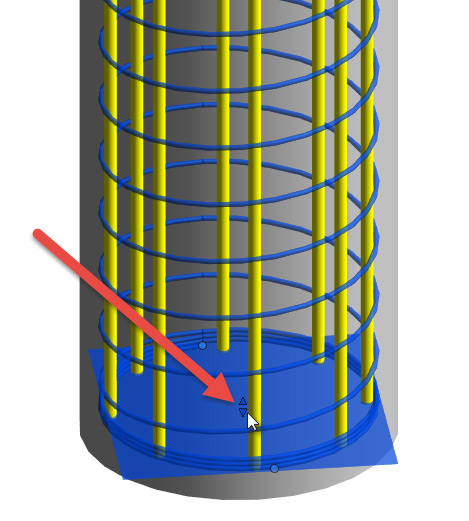
3. Unlike other rebar families, spiral rebar is multi-planar and cannot be edited at the family level. However, you can edit individual instances. For example you can easily adjust the height of spiral rebar using the triangle shape controls at the top and base of the rebar spiral. Simply drag the arrows accordingly to lengthen or shorten the spiral. These controls do not stretch the spiral. They add the proportionate number of coils required to maintain the specified height of the spiral rebar.
4. The following instance properties are unique to spiral rebar in the Instance Properties palette.
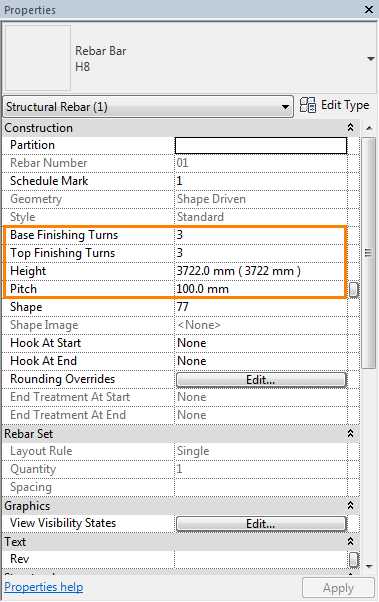
Base Finishing Turns -Specifies a number of complete coils to close the spiral base.
Top Finishing Turns – Specifies a number of complete coils to close the spiral top.
Height – Specifies the total height of the spiral rebar.
Pitch – Specifies the distance between rebar coils in the spiral.
For other tips and tricks related to using Revit to detail concrete rebar, visit these posts on BIM and Beam:
- Learn What’s New in Revit 2018 for Concrete Detailing
- Precast Column with Corbels in Revit
- Stepped Reinforced Concrete Foundations in Revit
- Rebar Shape Images in Revit
- How to deal with Rebar Detailing Visibility in Revit
@tomekf
The post Spirally Reinforced Concrete Columns in Revit appeared first on BIM and Beam.
from my Autodesk source Bim & Beam: BIM and Beam at http://blogs.autodesk.com/bim-and-beam/2017/05/08/spirally-reinforced-round-concrete-columns-revit/
via IFTTT
No comments:
Post a Comment