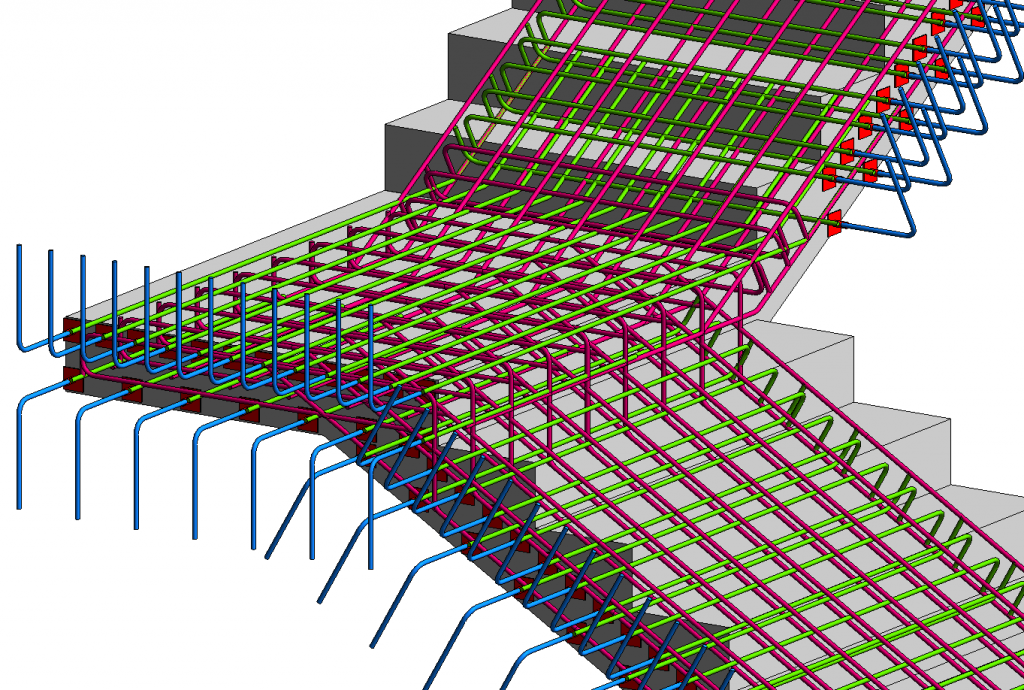
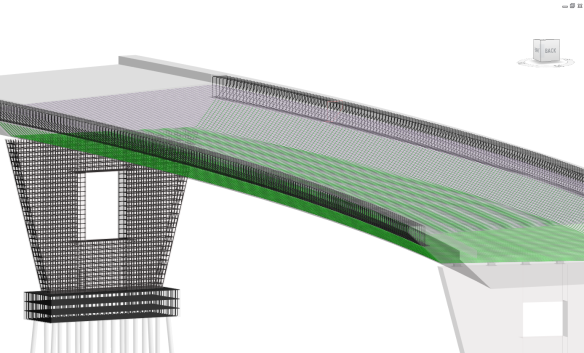
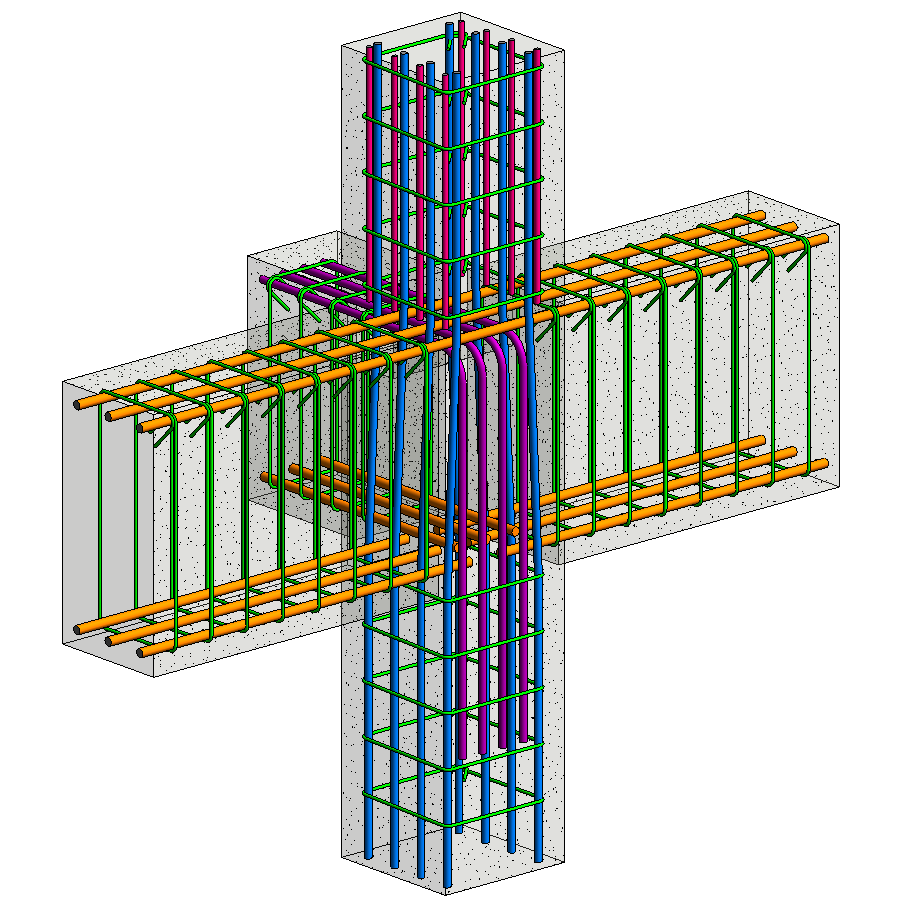
In order to better present, review and document all our rebar detail designs in Revit we want to have them displayed as solid objects and visible in concrete formwork in shaded views.
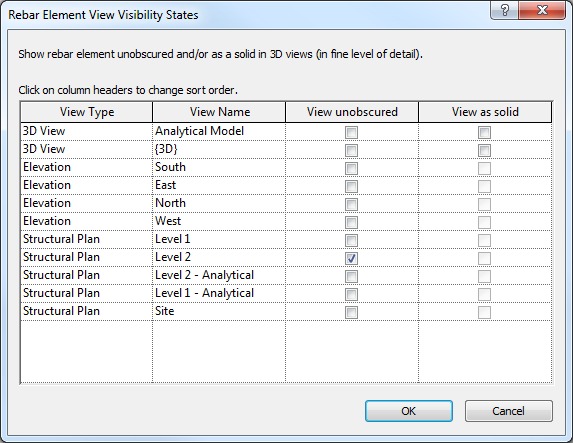
This requires that the rebars are visible in view as solid and unobscured by the concrete form. But this takes a lot of time and multiple clicks. What do I mean? Let’s have a look at Rebar Element View Visibility States. View Visibility States is a hard-coded property (instance parameter) of all Structural Rebars. It controls the visibility of rebars per view, and looks like this:
When you add a new rebar, by default its settings are:
- View unobscured (unchecked) – This property provides us with the opportunity to control if a bar is shown through formwork or not.
- View as solid – (unchecked)
To apply a new setting to our existing rebars we need to regularly select all Structural Rebars in the entire project and check the View as solid and View unobscured checkboxes for all 3D views.
When we change these settings—and if we rather want the rebars to show as lines—we can simply change to Medium Detail Level.
These are kind of annoying properties, that take a long time since changes you make here have to be made again for new rebars or even copied rebars.
In this post I would like to talk a little bit about ways to improve this repetitive task, and streamline your workflow in Revit.
IMPROVING CONTROL OF REBAR DETAILING VISABILITY
SOFiSTiK Reinforcement Detailing gives us a pretty handy and productive tool to quickly control rebar visibility states. The Visibility tool changes the view visibility states to show rebars unobscured and/or as solid in 3D views. You can do it without a need to select any rebar.
If you don’t own SOFiSTiK Reinforcement Detailing there is another way to change rebar visibility settings quickly. This time the BIM4Struc.Rebar Dynamo package comes in handy.
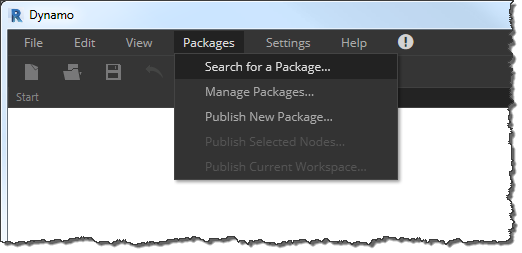
Packages are like add-ins for Dynamo. Packages are created by users like you and shared locally with colleagues or with the world via the Dynamo Package Manager. Packages may contain a single node or a full library of nodes that you can use in your own Dynamo definitions. The best place to find packages is the Dynamo Package Manager, available from within Dynamo in the Packages Menu.
Choose “Search for a Package…” to browse through available packages with descriptions and access to older versions.
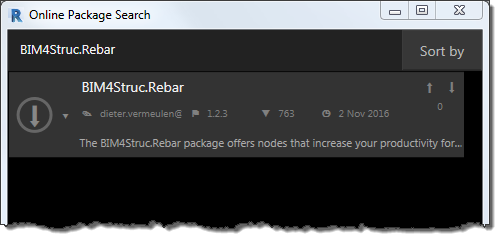
Choose the option to install the BIM4Struc.Rebar package, and the files will be downloaded and placed in the appropriate place on your hard drive so that Dynamo can access the new functionality.
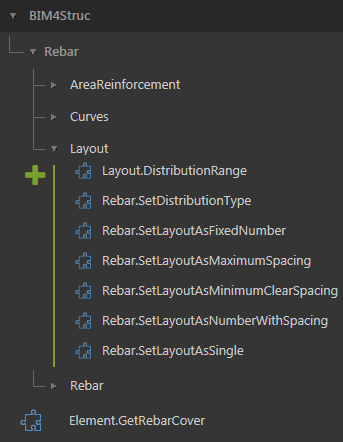
The BIM4Struc.Rebar package offers nodes that increase your productivity for Rebar modelling in Revit.
The nodes don’t only allow you to get data from existing rebar such as sketch lines, geometrical properties … but they also give access to automation of Rebar tasks (from the API) such as representation settings of rebar, rebar layout rules setting.
Combining these nodes with the rebar creation nodes (from the Dynamo for Rebar package) make it possible to create almost any complex rebar model.
Dynamo (visual programming platform) is fully integrated with Revit 2017 and no longer requires an additional download. It provides you with powerful scripting capability without any additional installation.
Now in a few steps I will show you how to create a simple Dynamo script with the BIM4Struc.Rebar package and how to utilize it on a daily basis in your Revit projects without a need of running Dynamo for Revit.
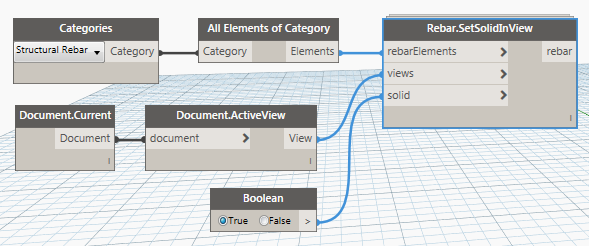
In this example we will create a Dynamo script that sets up rebar visualization settings (view as a solid) for all rebars in the active view.
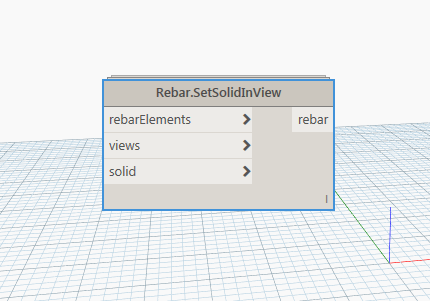
1) Add the SetSolidInView node. This node sets rebar elements to be shown solidly in a 3D view. It has 3 input parameters:
- rebarElements – list of rebars to set visibility settings
- views – list of views
- solid – a Boolean value to have rebars solid or wired.
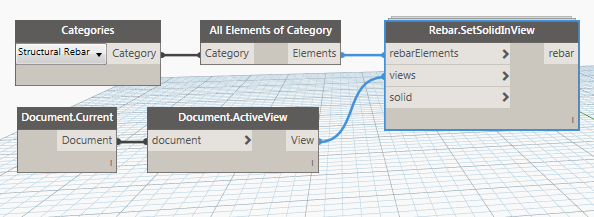
2) Now we need to provide a list of rebars. To expose our rebars into Dynamo, we need to add the node All Elements of Category to our graph. This node takes as input Revit Category node’s output.
3) It’s time to define a view. In our example we always update the active view when the script runs. Add the ActiveView node to the active view of the document. Don’t forget to connect its input with the Document.Current node.
4) The third input parameter is optional. Its default value is true.
5) Save the script as the Set Rebar Solid in View.dyn
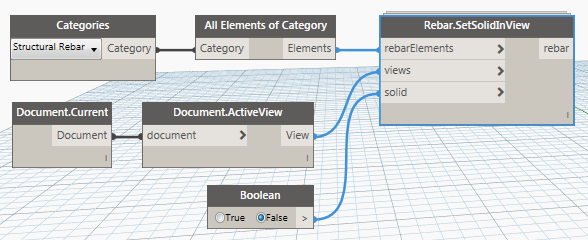
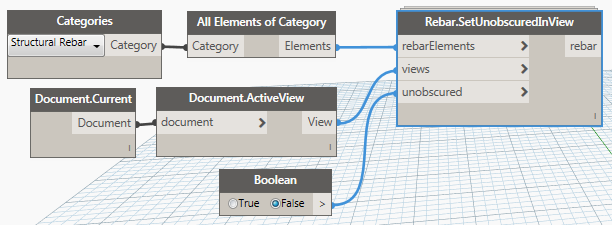
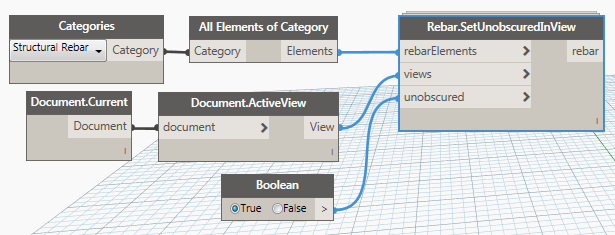
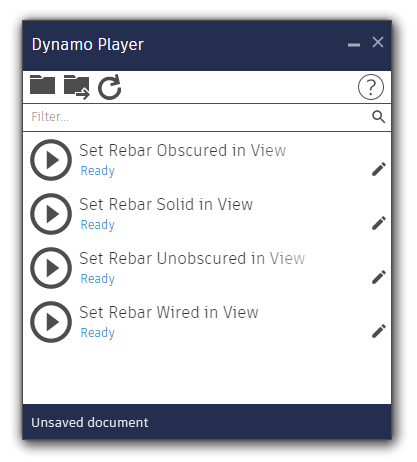
Now modify the script and create three additional scripts and save them respectively. Set Rebar Wired in View.dyn
Set Rebar Obscured in View.dyn
Set Rebar Unobscured in View.dyn
Revit 2017.1 introduces Dynamo Player. (See what’s new in Revit 2017.1 for Structural Engineers) Dynamo Player makes powerful scripts available to all users without the need to actually write the script. The scripts will run on the current Revit project file. Thanks to this Dynamo scripts are now easier to share, deploy and modify using an intuitive interface directly within Revit. You can find it on the Manage tab in Revit.
6) Run Dynamo Player. When opened, the Dynamo Player displays a list of Dynamo scripts in a specified directory. Beneath each script name, displays the status of the script.
7) On the Dynamo Player dialog, click . In the Browse to Folder dialog, navigate to a directory containing your Dynamo scripts you saved in the previous steps.
8) Now you can play your scripts in the Dynamo Player and see how quickly visibility of your rebar designs changes. No rebar selection and only one click to apply new setting.
If you are interested in Dynamo for Rebar solutions and if you would like to learn more about computational design for reinforcement detailing you should register for the ES15357 – Dynam(o)ite Your Rebar Design class at AU 2016.
This session will familiarize you with the Autodesk technology for complex reinforcement detailing with Revit software and Dynamo software. In this powerful 90 minutes, you will see a few examples, from the automation of basic rebar design over radial fan-shaped rebars to complex irregular elements. After this session, you will be inspired by the power and dynamics of parametric and computational design for complex problems.
Learn more about Dynamo for Rebar with Revit:
- Radial Reinforcement in Revit with Dynamo
- Rebar Modeling in Revit with Dynamo Use Case by ABT
- Dynamo for Rebar is now available
The post How to Deal with Rebar Detailing Visibility in Revit appeared first on BIM and Beam.
from my Autodesk source Bim & Beam: BIM and Beam at http://blogs.autodesk.com/bim-and-beam/2016/11/06/rebar-detailing-visibility-in-revit/
via IFTTT



No comments:
Post a Comment